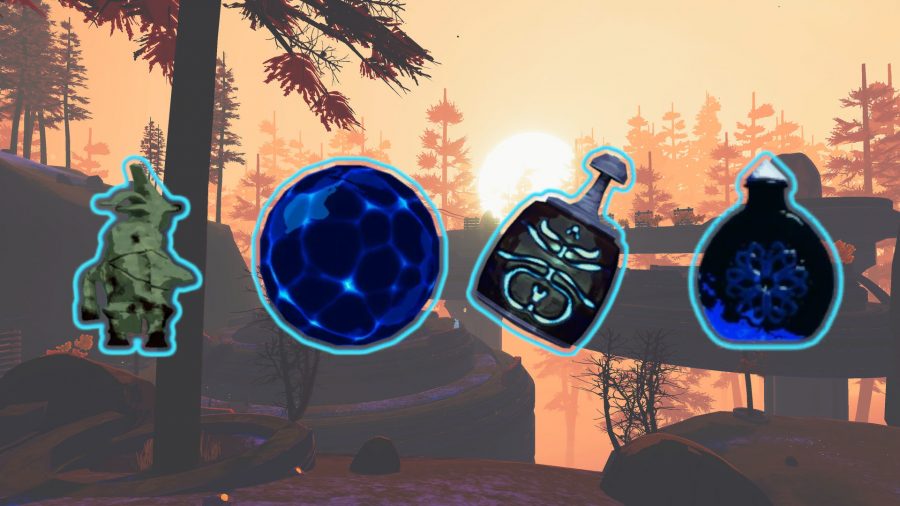
In this guide, we go over all Risk of Rain 2 lunar items in the game, along with descriptions of what they do, what type of character is able to make the most of them, and how to get them. With the help of these bad boys, you’re sure to be rocketing all the way to the moon.
If you want to get familiar with all the different survivors, head over to our Risk of Rain 2 characters guide. We’ve also got a list of the best Switch roguelikes, where you can explore a variety of titles in this engaging genre.
How do I get Risk of Rain 2 lunar items?
Lunar items aren’t as easy to snap up as others in Risk of Rain 2, as they don’t spawn from normal chests or bosses. Instead, you need to get your paws on lunar pods, or purchase the items from the Bazaar Between Time, both of which cost you lunar coins.
There are four ways of gathering lunar coins:
- Random enemy drops
- Drops acquired from the Forgive Me Please item
- Obliterate yourself at the Obelisk (you get more lunar coins if you
- have the Beads of Fealty and defeat the boss)
- Complete the game by defeating the main boss and escaping
Lunar coins do carry over between runs.
You can find lunar pods in various places around the maps, and you can open them in exchange for one lunar coin. Every lunar pod contains a random lunar item. There’s also a special type of lunar pod that you can purchase for the Bazaar Between Time called a ‘lunar bud’. These cost two lunar coins instead, but you can see which lunar item they contain before your purchase.
In order to access the Bazaar Between Time, you need to activate a Newt Altar. Three to five of these Newt Altars spawn per level, and you can activate them by offering one lunar coin. After this, you need to complete the teleporter event, which in turn spawns a blue portal that takes you to the Bazaar Between Time instead of the next event. There’s also a small chance that a blue portal will spawn as soon as the stage manifests.
Risk of Rain 2 lunar items
Beads of Fealty
The Beads of Fealty are an odd item, as they don’t offer any immediate bonuses. However, if you have them when you obliterate yourself at the Obelisk, you are teleported to a unique area at the end of the run, where you get the chance to fight an alternate final boss. After you defeat this boss, your run ends, so be sure to stock up on items before you use the Beads of Fealty.
Brittle Crown
When you equip Brittle Crown, you have a 30% chance to gain two gold for every hit you land. However, every time you get hit, you lose gold equal to the amount of health you lost in exchange. It’s a great item for earning gold quickly, allowing you to open heaps of new chests as you progress through the game. But with the possibility of going bankrupt if you continuously soak up damage, it’s best to avoid giving it to a tank or melee character, and instead use it with a ranged survivor.
Corpse Bloom
Corpse Bloom doubles the amount of healing you receive over time, to a maximum of 10% of your health per second, so it has the potential to make you pretty darn tanky. You can even surpass this limit if you also have a Rejuvenation Rack.
Defiant Gouge
With Defiant Gouge in your inventory, it summons enemies every time you use a shrine, which is great if you want to challenge yourself or farm more baddies. If you have more than one copy of the Defiant Gouge, the enemies it spawns are tougher, and they get even stronger as you progress throughout the game.
Focused Convergence
Focused Convergence makes the teleporter charge 30% faster, while also shrinking the teleporter zone by 50%. While the reduction in size makes teleporter events a little tougher for ranged characters, it’s great for speeding up the process, especially if you’re using short-ranged survivors.
Gesture of the Drowned
With Gesture of the Drowned in your inventory, it reduces the time it takes for your equipment to charge by 50%, but the equipment activates as soon as the cooldown finishes. This one’s considered one of the best Risk of Rain 2 lunar items, and can be handy for any survivor – especially melee characters who are caught in a sticky situation.
Mercurial Rachis
Mercurial Rachis creates a Ward of Power at a random place on the map, in which every character (including enemies) deals 50% more damage. This one’s a toughy, as, while it makes you stronger, it also makes the beasties you’re fighting stronger, so it’s only really suitable for survivors capable of controlling the ward’s AoE, and even then, it’s a gamble as to whether it’s going to be worthwhile.
Purity
Purity reduces the cooldowns of all your skills by two seconds, but it makes all random effects roll an extra time for a harmful outcome. Of course, this is quite a big oof, but it’s handy if you’re running a build focused on items that can reach 100% luck, as if an item reaches this threshold, it can’t be affected by Purity’s caveat.
Shaped Glass
Shaped Glass amplifies your base damage by 100%, while also reducing your maximum health by 50%. This item is perfect for ranged characters who keep away from the trouble, but can be deadly if in the hands of a survivor who spends most of their time getting up close and personal. Also, keep in mind that if you collect 127 Shaped Glass, you’re dead on the spot. Ouch.
Strides of Heresy
Strides of Heresy replaces your character’s utility skill with Shadowfade, which makes you intangible, increases your movement speed by 30%, and has your character recover 18.2% of your max health. This makes it a great choice for any character that gets right into the fray of battle, as it gives you a great escape button.
Transcendence
Transcendence increases your maximum health by 50%, then replaces all but one point of your HP with shields. These shields regenerate over a period of two seconds after you avoid damage for seven seconds. Any health you gain after equipping this item, such as through leveling up or picking up health drops, are also increased and converted into shields.
No health items affect shields, so equipping Transcendence renders any health items in your inventory useless. Mobility and avoiding taking DoTs are super important with this one, and you should avoid it if you’re playing as Rex as it means he’s unable to health leech, which is an integral part of his kit. Acrid, on the other hand, synergises well with this item as they can escape and recharge with ease.
Visions of Heresy
Visions of Heresy replaces your primary skill with Hungering Gaze, which sends out a bunch of tracking shards that explode after a short delay. Each shard deals 120% base damage, and you can hold up to 12 charges which reload every two seconds. If you’re using a character with a mediocre to weak primary skill, this item gives you a great boost.
Effigy of Grief
Effigy of Grief is actually classed as lunar equipment as opposed to an item. When activated, it places a pillar-like effigy at your cursor, inflicting cripple on all entities within a 15m radius – including players. Cripple slows the affected character by 50% and reduces their armour by 20. You can activate up to five effigies at once. If you place a new one after that, the oldest one expires, but aside from that, effigies don’t despawn. It’s best to use this item with ranged characters, so you can avoid hopping into the AoE and debuffing yourself.
Glowing Meteorite
Another piece of lunar equipment, when activated, the Glowing Meteorite darkens the world for 20 seconds, causing meteors to rain down. The meteors deal damage to everyone hit, including you and your allies – luckily, glowing blue circles appear on the ground, forecasting where the meteors are going to hit, so you have the chance to dodge. Each meteor dishes out a massive 600% damage with a proc coefficient of 1.0, suffering from linear damage falloff. If you want to rain meteors down across the battlefield with this item, it’s best to pick a mobile character capable of hopping out of the way.
Helfire Tincture
Helfire Tincture is a piece of lunar equipment that, when activated, surrounds you in blue flames for 12 seconds, which continuously inflicts the hellfire debuff on all characters (enemies, yourself, and allies alike) within a 15m radius. When a character leaves the fire, or the Helfire Tincture’s duration expires, the Helfire debuff persists for another three seconds.
The Helfire debuff deals damage to the affected character five times per second, with each tick dealing 0.5% of your max health as damage to yourself, 0.25% of your max health to other allies, and 24% of your max health to enemies. Luckily, the Helfire debuff is not lethal to the holder, so it can’t bring your health lower than one. As with Glowing Meteorite, Helfire Tincture is most suited to survivors capable of escaping the AoE as quickly as possible.
Spinel Tonic
The final piece of lunar equipment is the Spinel Tonic. Activating it dramatically increases all of your stats for 20 seconds, but once this time is up, there’s a 20% chance for you to gain the Tonic Affliction debuff. Ronic Affliction reduces all stats by 5% when the Spinel Tonic buff isn’t active. But if you’ve got the 57 Leaf Clover item, the chance for you to gain the Tonic Affliction debuff reduces from 20% to 4%. This piece of equipment is great for dishing out a massive heap of damage as any character, and as long as you have the 57 Leaf Clover, it’s unlikely you’ll have to deal with the negative side effects.
That’s every one of the Risk of Rain 2 lunar items available in the game, along with details on what they do. If you’re on the hunt for more exciting adventures on the go, check out our list of the best mobile shooters or the best Switch FPS, and go out with a bang.
